I have been busy resting some pieces that were flagged for my Design Your Wardrobe project. Unfortunately not many of them fit in with my #2018makenine plans but that can’t be helped!
One of the key missing areas in my planned Wardrobe was tops to fit in with my colour scheme and match existing and planned blue skirts/ trousers/ culottes.
This first make was made at a sewing club I have joined- The Cotton Club- in my local town. It meets every Wednesday morning in term time and is run by Abi, a lovely dressmaker who used to sew costumes for Strictly Come Dancing before starting her family. It’s great fun , especially chatting to other sewers ( sometimes more chatting than sewing on my part) and each term Abi tries to introduce a theme or new technique. Before Easter this was learning how to sew a scalloped edge and how to then add this to a garment. Here’s Abi’s inspiration for us!

So first I had to practise the technique. Now if I was doing this at home I probably would have dived right in- but practise makes perfect.
The scallops were drafted onto tracing paper using the lid of a coffee pot


and then transferred ( I used a friction pen) to 2 pieces of fabric placed right sides together. Careful and accurate sewing followed, and then equally careful trimming and snipping


before turning and pressing.

All having gone well so far I was told to choose an easy pattern to modify . In retrospect I could have gone easier( eg the Scout Tee) as having a back seam created a further stage of scallop matching.
The fabric I chose came from my stash (yay #sewyourstash) and is a very lightweight cotton viscose blend purchased in May 2017 from Fabworks

I chose butterick B6184 for the top- a pattern I acquired at a pattern swap I think possibly at the Sewing Weekender).


This is where the tricky part started- drafting / adding the scallops to the hem and sleeves. It’s not as simple as just randomly placing these on. They need to be even, and fit the pattern ( with seam allowances) for all pieces PLUS where seams join the scallops should match, ideally seaming at the indent of the scallop. After much fiddling, calculating and thinking( think twice, cut once) I finally managed to cut the top out.

The rest was relatively easy: the scallops were stitched in the same way as my practise piece before constructing the blouse as per the pattern instructions.

I did have to adjust the pattern – I had done my usual checks( short waisted) and checked the size( I cut a 10) but was surprised when I made it up that the bust dart was much too high. This isn’t a problem I usually experience. I lowered it by about an inch, with corresponding lowering of the waist fish darts too.
I am pleased with the final result. The scallops have been successful

The invisible zip looks good.

The fit again looks great
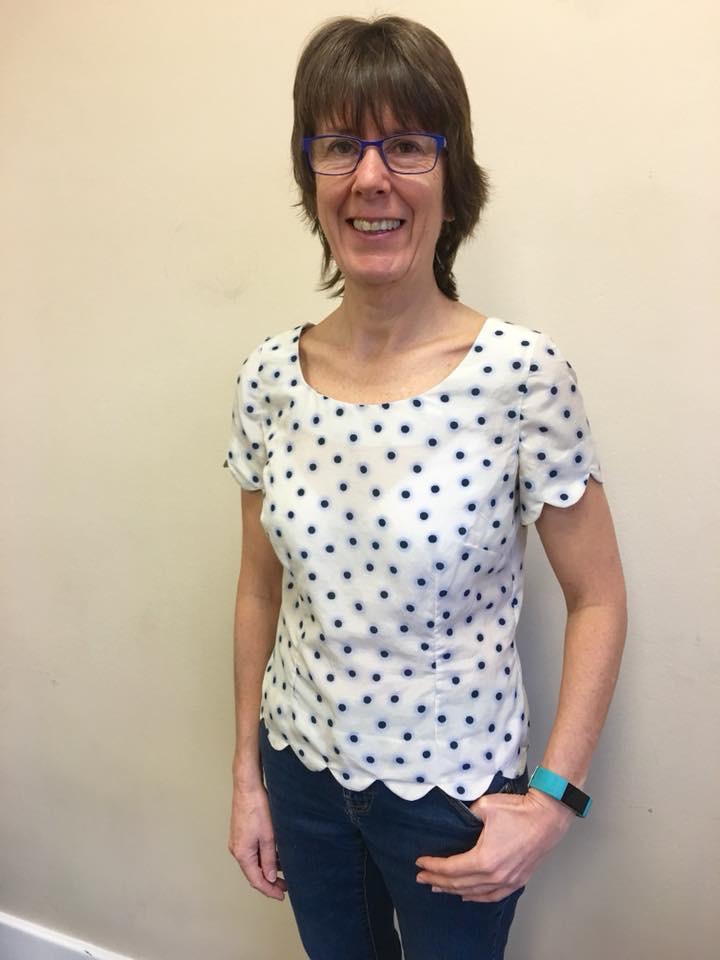
However there is a problem. Whilst the fit looks great, the sleeves pull. I thought maybe the armsync wasn’t right or something, but having consulted with Abi her suggestion was that the sleeve piece itself does not have enough width and needs to be adjusted. I can only believe this is a pattern drafting issue as I have pretty scrawny arms! As I want to use this pattern as the basis for a draft she suggested I did a toile altering the sleeve to try to address this.
Luckily the top is still wearable !


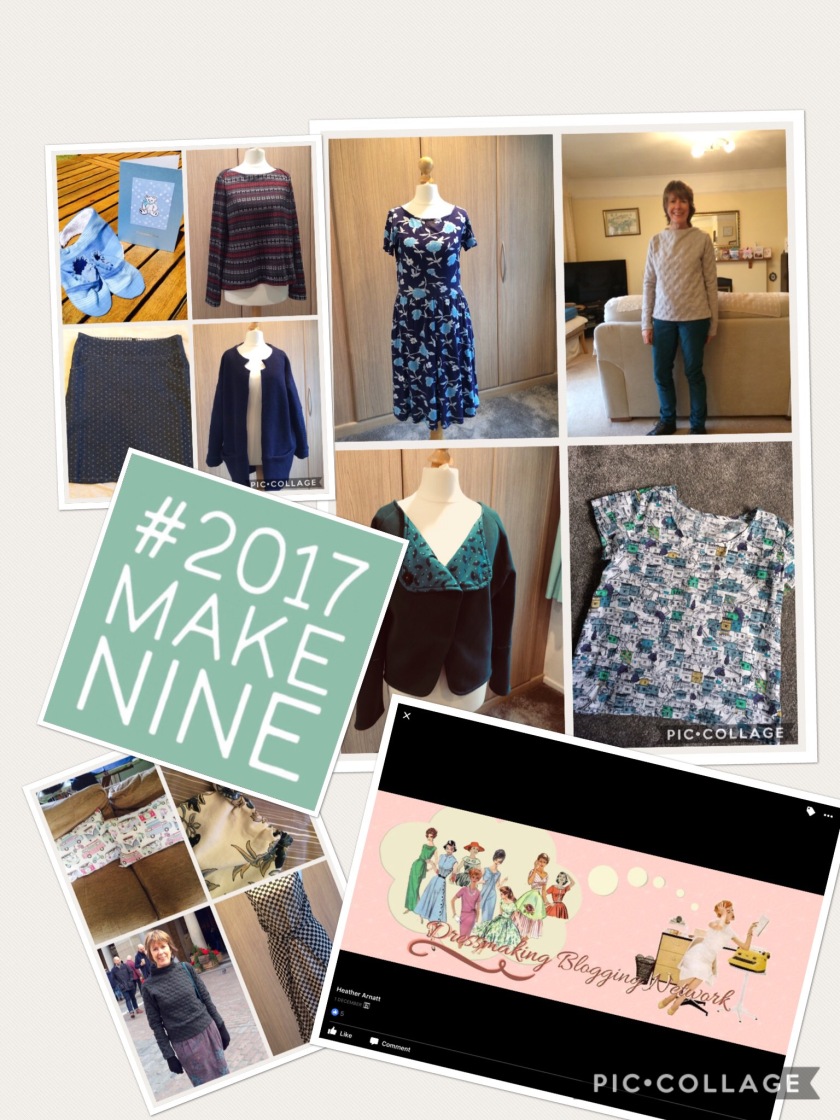
 I participated in the 2017 challenge for the first time and enjoyed both making and gifting and receiving a little surprise through the post. Last year I sent my


 So, I have my 9 patterns. Two of these are carried forward from 2017 but all others are new plans for a new year.